Price: $16.22 as of Aug 25, 2023 22:04:58 UTC – Details
This product has a 4.5 out of 5 rating as of Aug 25, 2023 22:04:58 UTC
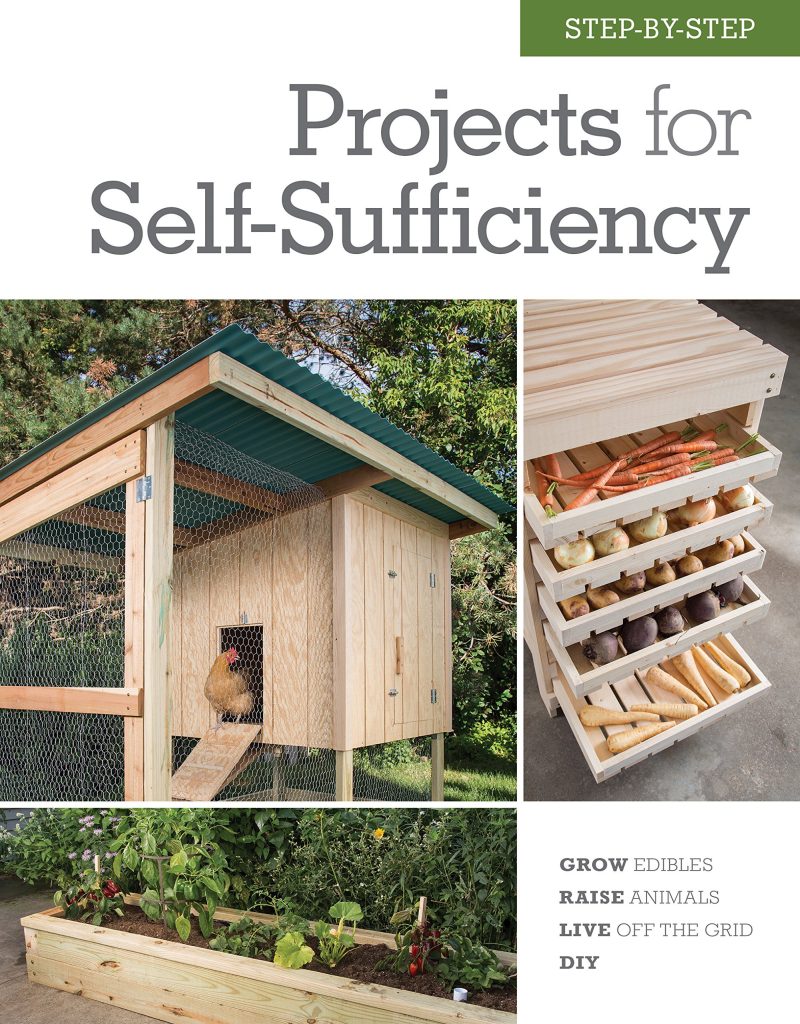
Build a self-sufficient life with these 60+ photo-illustrated projects for growing and preserving your own food, keeping animals, harnessing alternative energy, and more.
Learning to do more things yourself is healthy, rewarding, and fulfilling, and benefits the environment. Whether you live in the suburbs or have 80 acres in the mountains, Step-by-step Projects for Self Sufficiency guides your way with clear plan drawings, precise instructions, and detailed photos.
Organized into the categories Chickens & Other Creatures, Nourishing Your Garden, Garden Projects, Food Preparation & Preservation, Homestead Amenities, and Outbuildings & Fences, projects in this volume include:
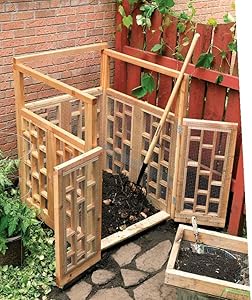
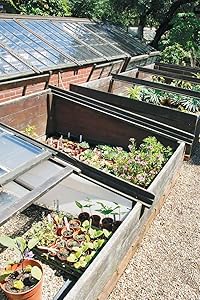
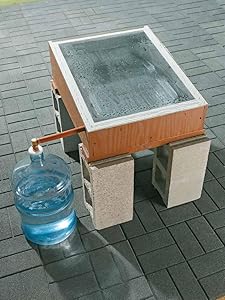
A portable chicken ark Two types of beehives Solar cookers Firewood storage A potato-growing box Hoophouses and greenhouses Raised planting beds Rain barrels A cider press Compost bins Drying racks And more
With these easy-to-follow projects, make progress, step by step, toward your goal of more independent living.
From the Publisher
Introduction: Building A Self-sufficient Life
Living a more independent lifestyle is a rewarding goal. By learning to do more things yourself, you gain control of the how and when and what of modern life.
The projects in this book are designed to help you reach the goal of self-sufficient living. The best part is that you don’t need to sell your townhome and move to 80 acres in the mountains to make use of these projects. Pick off a few here and there, and you can participate in the self-sufficient way of being without making the sacrifices required when living off the grid.
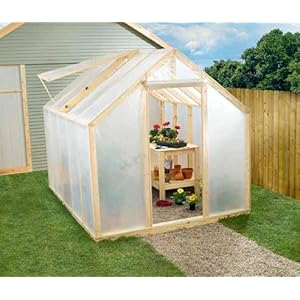
Building a greenhouse is a great way for gardeners to jump start the growing season, or to introduce new, sensitive plants to your garden. See page 280.
Contents
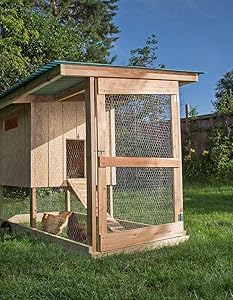
Section 1: Chickens & Other Creatures
A big part of self-sufficiency is producing your own food. But as delicious and nutritious as fruits and vegetables may be, protein is an important part of every diet. That’s where food animals come in, especially chickens. Chickens provide an ongoing harvest of eggs and can supply valuable meat as well.
Section 2: Nourishing Your Garden
In many ways, the self-sufficient home revolves around the garden. Growing and harvesting your own produce enables you to declare some measure of independence from the corporate food chain. It also allows you to control what goes into what you grow, meaning that you’ll eat less pesticides, chemicals from processed fertilizer, and other contaminants. And don’t forget the money you’ll save by raising your own organic produce.
Section 3: Garden Projects
Most of us don’t have acreage to plant; instead, we’re working with relatively small urban and suburban lots where planting space is limited, where vegetables and flower gardens have to share space with kids, yard furniture, decks, barbecues, shade trees, and pets. But limited space doesn’t mean you have to limit your ambitions. The trick is to be creative with the space you have, and to grow more with less.
Contents
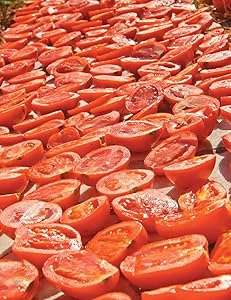
Section 4: Food Preparation & Preservation
We depend on our food, just as we do our air and water, to be healthy and wholesome. But increasingly, we have no idea where our food comes from and what is done to it before it reaches us. The farther we move from the source of our food, the more it needs to be processed to get to us. Although shelf life is increased, much can be lost.
Section 5: Homestead Amenities
The most important word in homestead is “home.” After all, everything you’re doing in a move toward self-sufficiency is aimed at making your home a better place to live. You can actually consider homesteading the improvement of your many homes—the world, your region, and the plot of land that holds that structure where you lay your head at night. This section is, in the final analysis, all about that last one.
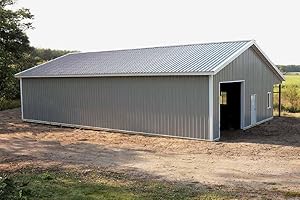
Section 6: Outbuildings & Fences
Anyone dedicated to the self-sufficient lifestyle will soon discover that they need additional storage space for equipment, sheltered growing spaces for plants to increase the size of the harvest, a shed or two, maybe a small pole barn, fences to keep livestock in and deer out the list goes on and on. You can spend a lot of money building these structures, but you don’t have to.
How to Build a Brooder Box


1. Make the lid cutout by marking four lines 4″ from the outside edges of the lid piece. Carefully lower your circular saw onto one end of the line and cut to the other end. Finish the cuts at the corners with a jigsaw. TIP: Roughly lay out the parts on the plywood sheet before marking and cutting the pieces one at a time.
2. Assemble the box frame using glue and 2″ deck screws. Fit the front and back pieces over the ends of the sides, drill pilot holes, then apply glue and fasten each joint with five evenly spaced screws. Use a framing square to make sure the corners are square as you work. Sand all exposed edges of the box and lid.
3. Use wire cutters to cut the box bottom and lid cover from ½” hardware cloth. Cut the bottom to 35¾ × 35¾”; cut the lid cover 34 × 34″. Screw 1 × 2 cleats to the bottom edges of the plywood box frame, then staple on the bottom cloth with heavy-duty ½” staples. Keep the edges of the mesh 1∕8″ from the outside edges of the box on all sides. Staple the lid cover to the underside of the lid frame, keeping the mesh 1″ from all outside edges. Use plenty of staples on the cover—and staple close to the edges of the cutout—to prevent predators from pushing down the mesh.
How to Build a Brooder Box


4. Create the two handles, beveling one long edge at 15°. Cut the strip in half to end up with two 6″ long handles. Install the handles with glue and 15∕8″ deck screws so the top edges of the handles are about 2″ below the top of the box sides. The long beveled edges face down and toward the box side, creating an easy-to-grab lip for each handle.
5. Inset: Construct the light pole mount by drilling a ½” centered hole in the end of a scrap 2 × 4. Ream the hole until the dowel fits easily and can be slipped in and out to facilitate box cleanings.
6. Install the box lid using two separable hinges (also called removable or lift-away hinges). Depending on the hinge design, you may want to recess the hinge plates on the box by cutting shallow mortises, using a wood chisel. Add a locking hasp latch to the front side so the lid can lock securely to the box front. Clamp the light fixture to the dowel and plug it in to test the setup.
Publisher : Cool Springs Press; Illustrated edition (March 15, 2017)
Language : English
Hardcover : 352 pages
ISBN-10 : 159186688X
ISBN-13 : 978-1591866886
Item Weight : 3.15 pounds
Dimensions : 8.55 x 1.1 x 10.9 inches